
Forensic Friday 69: Underground Floors, Structural Integrity and the Final Evolution of Pipes

Hey Readers! #
Welcome to Forensic Friday 69! It has been a long while, but we are back, and a lot has happened! We took a break from business as usual due to a lack of development from life stuff, but we still managed to do work anyway so wasn’t totally necessary. Anyway, there is a lot to cover, and we don’t want this blog to get ridiculously long (it got long), so let’s just jump straight into what we have in store: Better pipes, better structural integrity, and probably most significantly underground floors! All this comes under an effort to polish up the construction side of things, which is arguably the most important aspect of the game. Well… let’s get into it!

Kicking a Dead Pipe #
If you’re a regular reader of our blogs, then you’ll know of the hardships and battles we’ve had while trying to implement fluid pipes. A problem that persisted for way too many years of development for my liking, we finally reached a point where we had a solution. You can take a look at Forensic Friday 23 and Forensic Friday 24 for more info, which goes into more depth about our fluid system’s inner workings. Fluid was still flowing slowly (the videos in the FF23 and 24 blogs were at 10x speed), but the introduction of pumps kind of made this a low priority for us. It worked, and that was better than any other solution we’d tried before.
Throwback to Forensic Friday 17, when we first attempted to tame the beast
Fast forward roughly 450 days, and I was lying in bed, staring at the void of my bedroom ceiling. Our cellular automata was an array of fluid cells - each one containing a fluid type or empty. A random cell from the list was chosen and transferred to a random adjacent fluid holder at every iteration of the algorithm. This randomness was what made our fluid system work, where previous attempts had failed - if something was mainly empty, then you’re more likely to choose an empty cell to transfer (so fluid transfers from high-volume areas to low-volume areas). The transfer fluid in and out cells described in FF24 had since been removed in an attempt to make everything flow faster, and since we were now relying on probability alone for fluid to decide where to go, why were we modelling fluid holders with an array? The simple answer was “If it ain’t broke, don’t fix it”. But, in a very convoluted step, due to a number of refactors in between, we were essentially picking a random number by choosing a random cell from an array. The problem with this? Just a lot of unnecessary array operations, which are memory and performance-intensive, while providing no benefits compared to alternatives.
I’ve taken a step back from coding in recent months but had a couple of weeks’ holiday from work, which freed up some time to let my intrusive shower thoughts come to fruition. Moving the fluid system from using an array to a data-centric approach, we now have a much more performance-friendly solution with a couple of key benefits. Every fluid holder now has a set of key-pair values - the fluid type, and the amount of that fluid type present. Since we’re no longer modelling cellular automata with arrays, we’re no longer constrained to 1 cell containing 1 type of fluid (for reference, a pipe contained about 100 cells).
In gameplay terms, this means that, while previously the smallest amount of fluid we could transfer was 1 cell, we can now transfer any specific number we want. This means we’re no longer constrained to fluids being multiples of 5 litres (the minimum cell size). This also means in a single fluid system iteration, multiple types of fluids can be transferred between fluid holders in smaller quantities. E.g. if we wanted to transfer 15 litres of fluid from 1 pipe to another, previously we would have had to transfer 3 cells, which means a maximum of 3 different fluid types. Now, transferring 15 litres is a lot more intuitive - we can move fractional amounts of each fluid type in the same tick. So if a fluid holder contains 7 different fluids, then we can take the proportional amount of each of the 7 fluid types in the same iteration.
The result is that we now have a fluid system which is:
- more memory efficient
- no massive arrays holding potentially 1000s of fluid cells
- faster computationally
- to calculate amounts we don’t have to loop through that massive array of cells, just add amounts for each unique fluid type
- fewer iterations needed per game tick (from 80 to 20)
- more scalable - we can add new properties to fluids that we couldn’t previously, since before everything was limited to being a cell
- different viscosities of fluids, allowing different fluids to travel at different speeds
- temperatures for fluids (WIP) which will pave the way for boilers etc.
- from a dev point of view, new fluids can be added using Unity’s scriptable objects
- more intuitive
- no constraints on fluid cell size - you can transfer any amount, not just a multiple of 5!
- easier to variate flow rate through pipes depending on conditions
Along with these changes, there have been some minor changes to all existing fluid holders to work with this new system, which has improved (at least in my opinion) how they work in-game. Some of the most noticeable ones are:
- Pumps now pull from the fluid holder going into them, as well as pushing outwards, making them transfer fluid a lot more effectively.
- Showers now take each unique fluid type and their corresponding amounts for calculating the hygiene score that should be given to an NPC after showering. Previously, a shower output 6 fluid cells every game tick, which we then used to calculate how clean the NPC was. Therefore your shower could’ve had sewage in it, but by random chance you got 6 water cells, giving your NPC a 100% satisfaction score. Now proportional amounts of each fluid present are used.
- The water purification plant now separates fluids in the same proportion as they come into the plant. If you have 200L of sewage and 100L of water, then the plant will always output both sewage and water in separate outputs, in a ratio of 2:1, e.g. 10L of sewage and 5L of water every tick. Previously, the water purification plant took from a number of random fluid cells, so you weren’t guaranteed to have both water output and waste output consistently.
I know better than to call this a done deal - there’s always something else, but I’m extremely happy with how this has worked out so far, and it’s definitely a major improvement on top of what we had already!
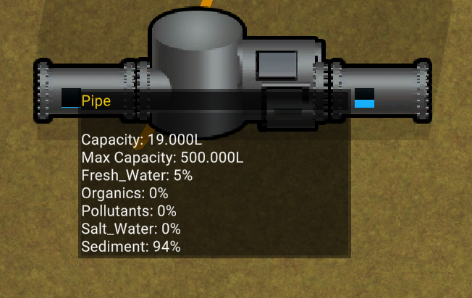
Fluids like sediment do not travel as fast as water so they get left behind…
Fluids in a new dimension #
This all nicely ties into why I was staring into my bedroom ceiling thinking about pipes (no, I don’t just do that normally, I swear). In recent weeks, we’ve been polishing some aspects to do with multiple floors - more on that later on in this blog. Fluid pipes had been such a pain to implement, and by the time I implemented the current system, I was so desperate to move on that I never actually got around to making them connect between floors. Fast forward the 450ish days and that was the singular goal for my 2 weeks off - make pipes connect between floors. This shouldn’t have taken that long, but sent me down the rabbit hole of a basic reworking of the fluid system as I just described in the last section.
However, enough of that - what’s important is that pipes now connect between floors. Putting a pipe on a floor above another pipe automatically connects them together. However, this is where another change to how we simulate fluid flow was required. If a pipe is above another pipe, you would expect all the fluid inside to flow to the bottom due to gravity. Therefore, our whole rule about “choosing a random neighbouring fluid holder to transfer to” needed to be reworked as well. I trialled a system whereby there is a greater probability that fluids will flow downwards, than sideways or upwards. This worked great but kind of led to a bit of a headache when it came to flowing upwards.
Over enough iterations, the probability dictates exactly where the fluid will go, so giving a greater probability to travel downwards meant that fluids ALWAYS travelled downwards. Which is fine, except when we had a pump on the bottom floor and wanted to pump upwards with pressure. In this case, a tiny amount of fluid would go upwards, and then a larger amount would immediately try to flow back down to where it came from, meaning the fluids were kind of stuck in limbo on the ground floor. Messing around with the order of execution between entities, so that pumps always filled up their adjacent pipes, before the pipes on the floor above transferred their contents back down again, proved useless since this just offset the problem by a single floor - now we had an issue transferring fluids between multiple floors without using a pump on every floor. A very simple and effective workaround ended up being that we bump up the flow upwards probability when the fluid in the pipe is above a certain threshold. I chose 90% as a threshold, but I’m sure we’ll play around with this for larger fluid holders. If pipes hold 500 litres, then when the pipes reach 450 litres, fluids in that pipe can start to flow upwards. This will still flow back down again, but since a larger quantity of fluid is now being shifted upwards in a single iteration, this gives the pumps some extra game ticks to fill up the pipe on the lower floor.
The result is a fluid system that is multi-floor and appears to be affected by gravity, while also being able to be pumped to floors above without having to use a detailed pressure metric (which we’ve unsuccessfully attempted to use in a lot of failed versions of the fluid system). With a more efficient way to get the total fluid in a fluid holder (we have a memoized value), this has also opened the path for pipes using the structural integrity system - which Teniesha will talk more about next. Interestingly, fluid in a pipe increases the weight dynamically, which could cause some really cool real-time “physics” to take place.
Buildings collapse with Style #
Well, well, well. Mighty fine work there with the pipes Dillan! (Feels very weird speaking like this, since we write these blogs asynchronously so I am just talking to myself here). I have been given a nice segway into a very interesting addition to the game, and a rather random jump forward in the roadmap that I tend to occasionally do. As I started my break from Containcorp, which ultimately put a temporary pause on these blogs; and started cracking away at my master’s thesis (which has become a mountain of work lately), I was consumed with the sudden urge to completely redo the structural integrity system. This came as a natural progression from my efforts to polish up the construction a bit and led me down a long, deep rabbit hole of structural engineering papers and obscure Reddit posts. Turns out, structural integrity isn’t a very well document feature in games! So the approach I went for is quite novel, however on the way there I managed to touch upon various different methods that are all quite interesting in theory. So I figured, I ought to share my process before I show the final result. So time to commence probably the longest blog section I’ll ever write.
What came before… #
The original structural integrity system was actually quite unrealistic. And sure, that’s totally fine, we are just making a video game after all. Realism doesn’t always lead to good or interesting gameplay; rather can lead to the opposite: frustration! However, this is a game where NPCs need to use the toilet, so we have already crossed that “in-depth” simulation line. Anyways, I digress…
The original system worked like this:
- When a tile is placed, it calculates the weight of all the tiles above it.
- Then it floodfills through the structure to find the nearest support point.
- Then it calculates the moment, which is the horizontal distance to the support * the column weight, which gives a measure of how much the support is able to… well, support it.
- Then finally… and this is where it gets weird. It applies stress to itself based on this moment.
It might not be immediately obvious why that last rule is nonsensical, but imagine a really big upside-down L made of plastic. If an oversized lad stood on the end and jumped up and down, you’ll imagine the L would break at the corner or would break at its base. However, you wouldn’t expect the L to break where the person is standing. Right? (Hopefully, the illustration below helps)
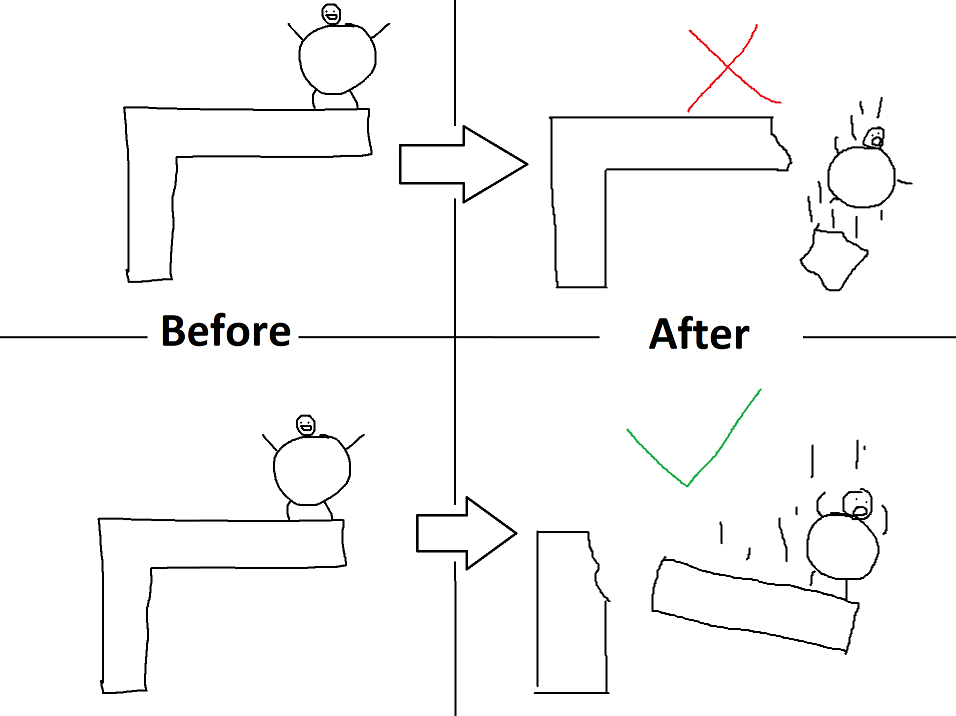
However, with the old system, this is precisely what would happen. If you take a look at the images below, you’ll see that the structures are all stressed at the extreme ends, instead of where you’d intuitively expect!
This happened to be a complete oversight, that remained so for quite a while! But no more! When I realised how unrealistic the current system was, I had to change it. So commenced my investigation into various methods of modelling structural integrity!
Failed Approaches #
I tried various approaches to model structural integrity. The two I’ll discuss are the support backpropagation approach and the particle approach.
The Support Backpropagation Approach #
Not sure whether backpropagation is a good term to use here as it’s associated more strongly with machine learning. However, it makes sense to me, so hopefully it’ll make sense to you! This approach was similar to the original method, but tried to tackle the main issue, which was the flow of stress toward support was not accounted for. In this approach, I tried this algorithm:
- When a tile is placed, it calculates the weight of all the tiles above it.
- Then it floodfills through the structure to find the nearest support point.
- For each tile towards the support, accumulate weight from every other tile column weight, and apply weight to each tile
- Apply weight to support.
This is roughly how it worked. And it.. did not work. There were too many edge cases, and it took too much time tweaking and tinkering. So I scrapped it and tried a different approach…
Particle Approach #
The particle approach was very novel to me. I showered through the bins of Reddit to find a 3-year-old post about applying structural integrity in voxel games and managed to find a stray comment which said, and I quote:
It’s quite easy you simply treat each voxel as a particle (with bonding and bouncing properties) however in your update simply don’t apply any changes to their position and instead take the difference between their current position and their desired position and call that ‘stress’.
For the bonding/bouncing equation I would suggest following the easy-to-implement and fast-to-calculate electron repulsion curve, for voxels just make sure your bond/bounce sink is at a distance of 1.0
Enjoy - u/Revolutionalredstone
It was not easy… Sure it was easy to implement, but the results were not great. If what he said above doesn’t make sense, effectively, the approach was to treat every voxel/tile in our game as a particle. Each particle interacts with neighbouring particles according to a single function. This function determines the magnitude of attraction and repulsion between particles at any given time.
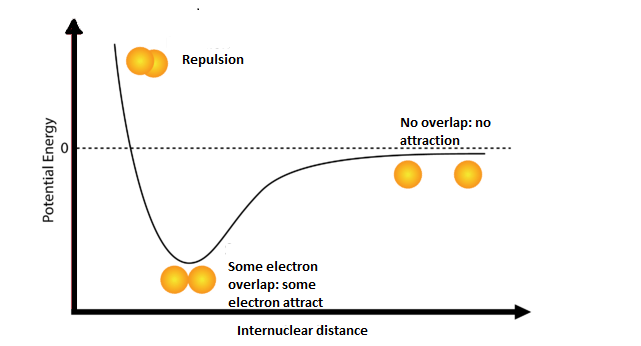
This function is the electron repulsion curve, and in short: Things that are close repel, and things that are far attract until they are too far.
So I went on to implement this and all I was left with was extremely unstable structures that refused to stay together when I tried to introduce gravity. This approach really only works when you simulate with really small timesteps. I am sure they could have spent a few dozen hours tinkering with parameters and adding small hacks here and there to make it work, but the performance was also atrocious. So I decided to scrap it, which was unfortunate, as it had given me a taste of real-time structural integrity simulation, where the former approach had been a one-shot “static analysis” approach that only ran when you placed a block.
The real-time approach leads to a lot of interesting emergent features, such as dynamic loads (structural integrity is affected by NPCs walking around and such) and influence from external factors such as wind, rain, flooding, earthquakes etc. So I couldn’t completely drop this approach. Instead, I decided to do a good old combination between the static method and this high-fidelity simulation method: Cellular Automata! The simulation paradigm can really do anything!
What we have now: Cells! #
Where fluids in pipes may have transitioned from cellular automata to probability. Structural integrity has gone full tilt into cellular automata. Cellular automata were a good fit as it allows for real-time calculation, which lets us do cool dynamic things, but is also easy to parallelise, and easy to understand the cause and effect (since we handwrite all the rules). You can also split up the processing into separate stages which helps divide up the calculation into easy-to-grasp steps, and it works a charm!
The current ruleset is as follows:
(Source) All tiles output their weight as into their Y load.
(First Rule) Any tile with no tile beneath it transfers Y load into the tile above. If there is no tile above, then it is marked for death.
(Second Rule) Tiles weigh down on tiles below them, transferring Y load.
(Third Rule) Tiles distribute Y load to horizontal neighbours as X load and distribute Y load to vertical neighbours below as Y load.
(Fourth Rule) Tiles transfer the load to the ground, where it gets divided by the ground strength.
(Last Rule) Any tile that is overloaded on X or Y load dies.
You may notice, that the ground is mentioned there. Well, whilst I went on to implement the new structural integrity system, I also managed to implement underground floors. More about that in the next section. However, this new structural integrity system integrates very nicely with the underground floors, as now, since structures are more realistic foundations are actually needed to build tall buildings.
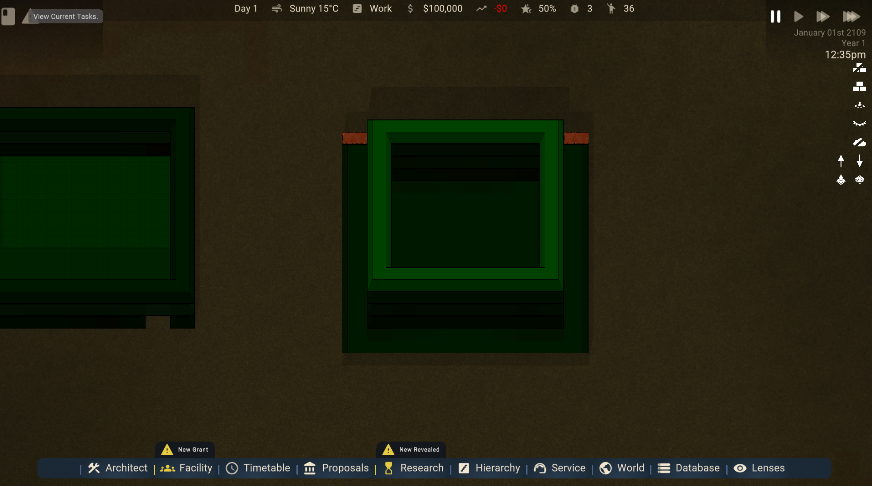
A 3-storey structure stands
But the base soon breaks, because of the overbearing stress!
This is because this cellular automata system is effectively analogous to flowing water. Tiles within structures are like magic pipes, allowing stress to flow through them whilst constantly outputting stress, and stress flows from the top of structures to the bottom. The ground acts as a sink for stress, absorbing it. A natural consequence of this is that the surface area of the ground the structure is exposed to allows for more stress to be dissipated, which means building foundations allows you to create a larger surface area for stress to be released (than without). It’s a pretty interesting way to think about stress and structural integrity!
A 4-storey structure stands
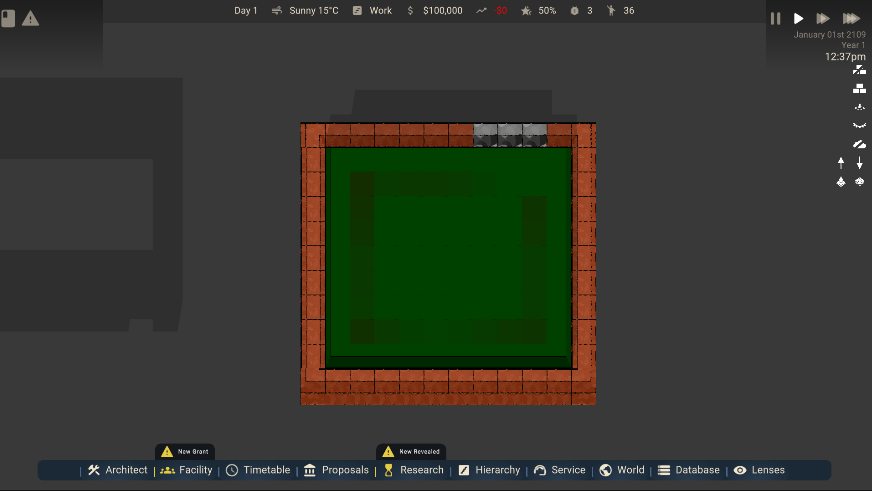
And remains standing, because a foundation was built! (Notice the stress imparted on the foundation)
This new system also allows us to define load strength in both horizontal and vertical directions, which is analogous to shear and compressive strength. Which allows us to model a wider range of materials. For example, foundation concrete has very high compressive (Y load) strength, but very weak shear (X load) strength, so it’s great to take the weight of buildings, but you’d struggle to make a bridge out of it!
It will still need some tweaking, but right now it works very well and is performant enough for our needs so far. But the talk about excavating foundations brings us nicely into one of the biggest additions to the game for a long time. Underground floors!
Dwarfcorp #
Negative Floors??? #
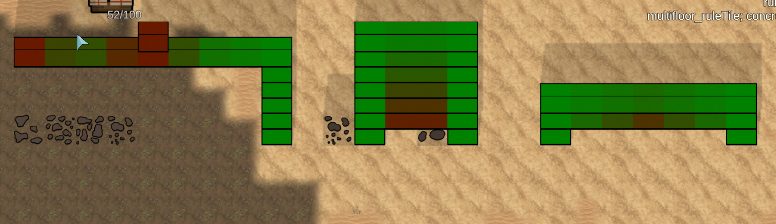
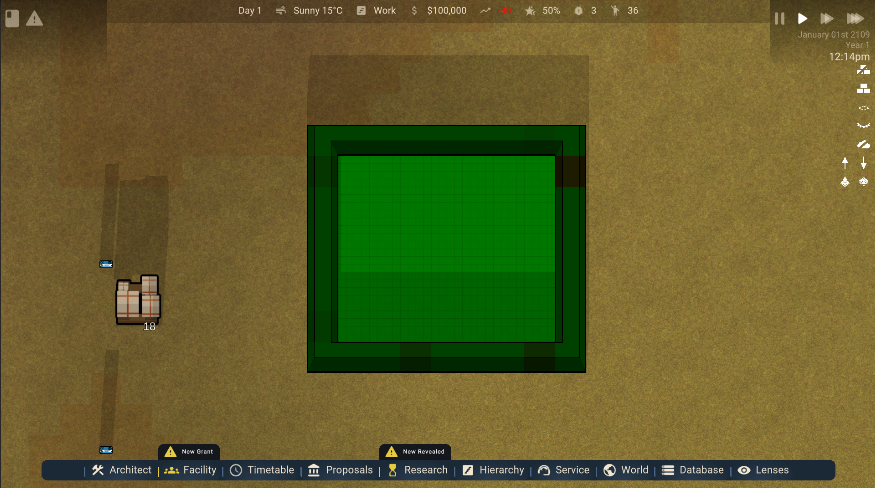
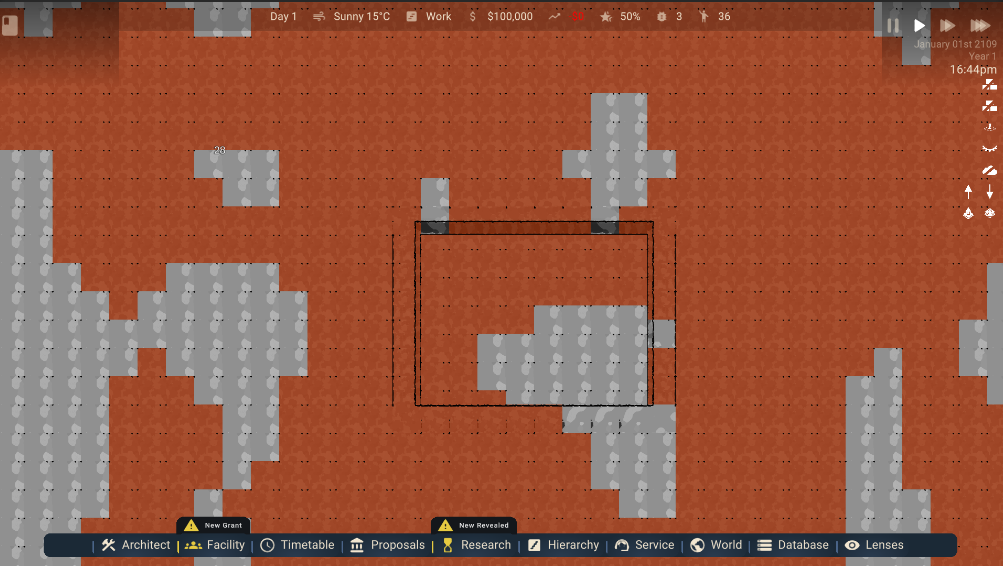
Containcorp has ventured into the territory of dwarf fortress. Underground floors now generate when you make excavation orders. The ground is made up of a various composition of rocks, clays and dirt (well only one of each type for now), which will have different properties in the future, such as mining time, and how much it can dissipate stress.
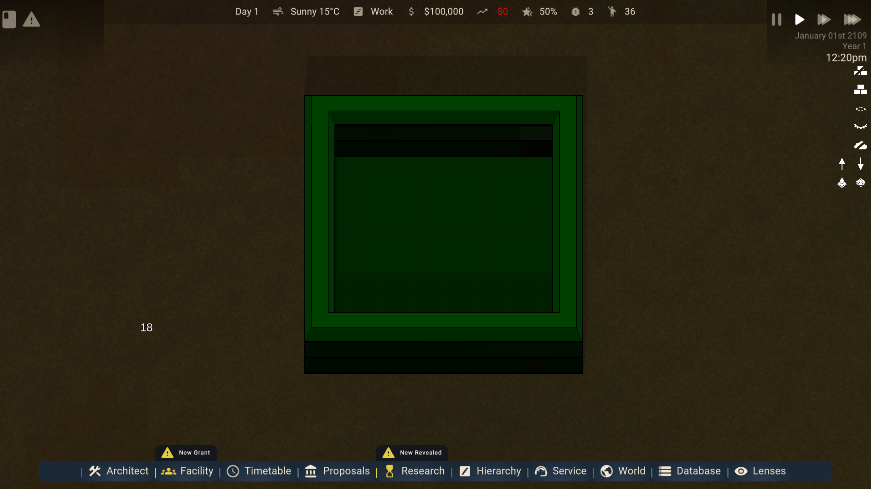
Every time a new negative floor is generated, as you’ll see in the image below, there are various patterns of rock! Neat!
Currently, you’ll only see the ground you have excavated, so there is sort of a “fog of war” going on with excavation. Eventually, we want to add features like caves, and underground reservoirs, make heat increase the lower you go, and also make gases fill up in underground pockets. All of these features are pretty achievable with even the systems that we have in the game already, but they don’t exactly fall into the “critical features” territory, so who knows when we’ll implement those.
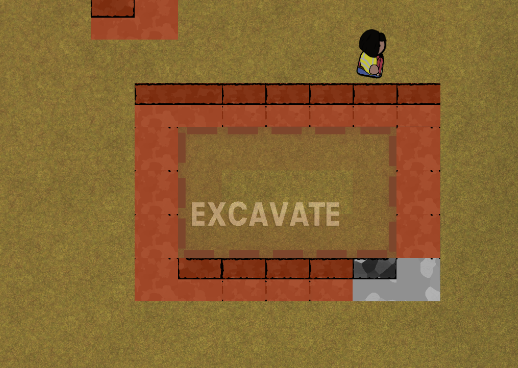
Excavation #
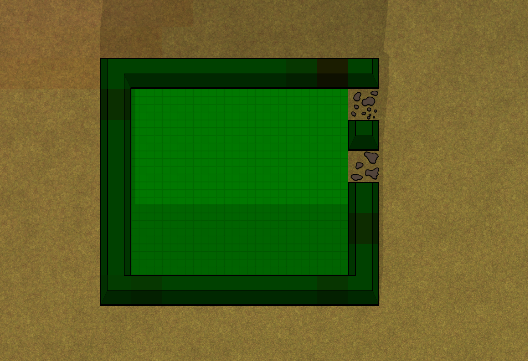
I also went and added a new feature to the architect menu: Orders. The only order in the game right now is excavation, but in the future, you can imagine other orders such as “clear snow”, “clear rubble”, “clean”, etc. Excavation simply digs one tile down into the earth, revealing 2 levels of underground…ness. You’ll notice there are also progress bars where the NPCs dig, which is also new. We now have an arbitrary way to display progress bars! But I wouldn’t say this is very interesting :P I did have to stop NPCs from excavating under their feet, which was hilarious when they would fall to their demise by their own hands.
However, there are still some issues! Like NPCs blocking themselves off! This is an issue that we’ll find a solution to eventually, but my running idea is to selectively make NPCs excavate in a set order. Currently, NPCs pick the closest thing to excavate which leads to the issue below. Ideally, we want to only advertise the action to NPCs if when that tile is excavated, it doesn’t split the excavation order zone into separate chunks! But nothing can be perfect!
Ow, I broke my leg! #
NPCs can also fall down holes now, which is actually rather annoying. Especially since currently, falling down even just a metre is enough to have NPCs bleed out and die. I don’t think dying from a broken/crushed foot makes much sense, so there’s clearly some balance needed there. But the upside is that our system to give damage to specific heights of the body works rather well! Though now thinking about it, NPCs always land on their feet. Are they cats?
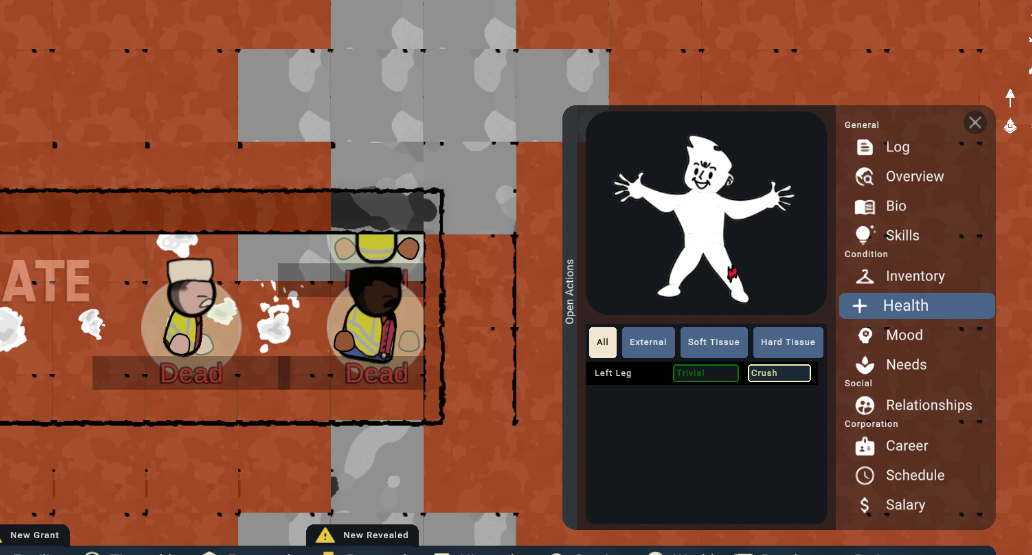
NPCs all dead from broken legs :(
The fall damage is exponential, so falling down 10 metres will probably destroy an NPC spine completely. Falling down 100, instant splat. From my terrible memory, I think after a certain distance, they will insta-die. Which might not be a good thing to have. It would be great to hear stories from players about a crazed Scientist who managed to fall 100 meters into the on-site quarry due to their bionic legs. so we’ll have to reconsider that.
My producer (which is Dillan, but also me?) tells me I must mention that the loading of underground floors is multithreaded. So no need to worry about performance hitches.
NPCs also avoid holes now, so it would take an extraordinary event (like being pushed) to make an NPC fall down a hole. So be careful!
When all ways are blocked, walk up #
NPCs are gaining many new abilities. First digging holes, then falling down them… now they can do the opposite (of falling). They can path between floors. No longer are you limited to building structures on multiple levels with your NPCs completely ignoring them and staying on the ground floor. Now you can make your facility, a skyscraper if you so wish. Or a reverse one if you dig into the ground!
Containcorp through a Logistical lense #
We now have a new logistics view to help simplify the process of building anything logistical. This is extremely important in our game since logistics are about to get that little wilder with 3 dimensions to work with. In the logistics view, you’ll be able to view and edit your fluid and electrical layouts in a less mind-hanging way!
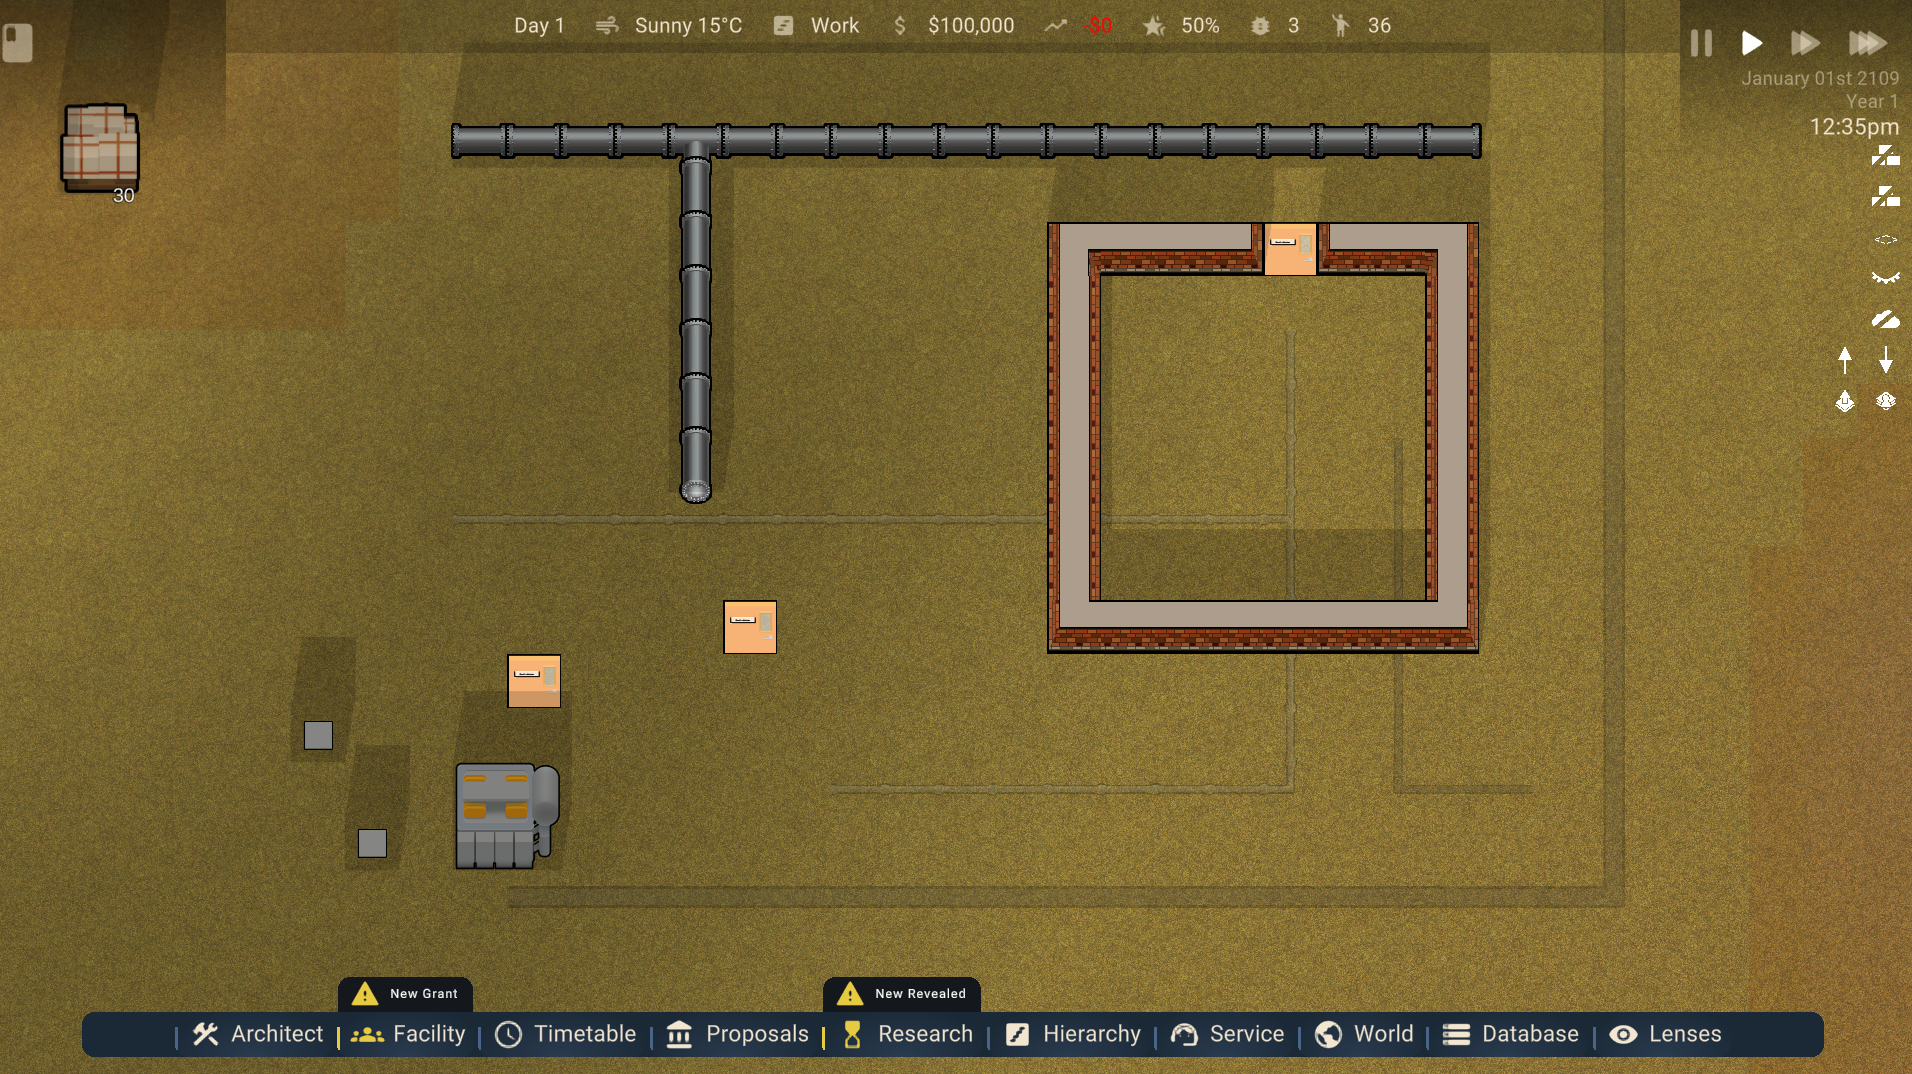
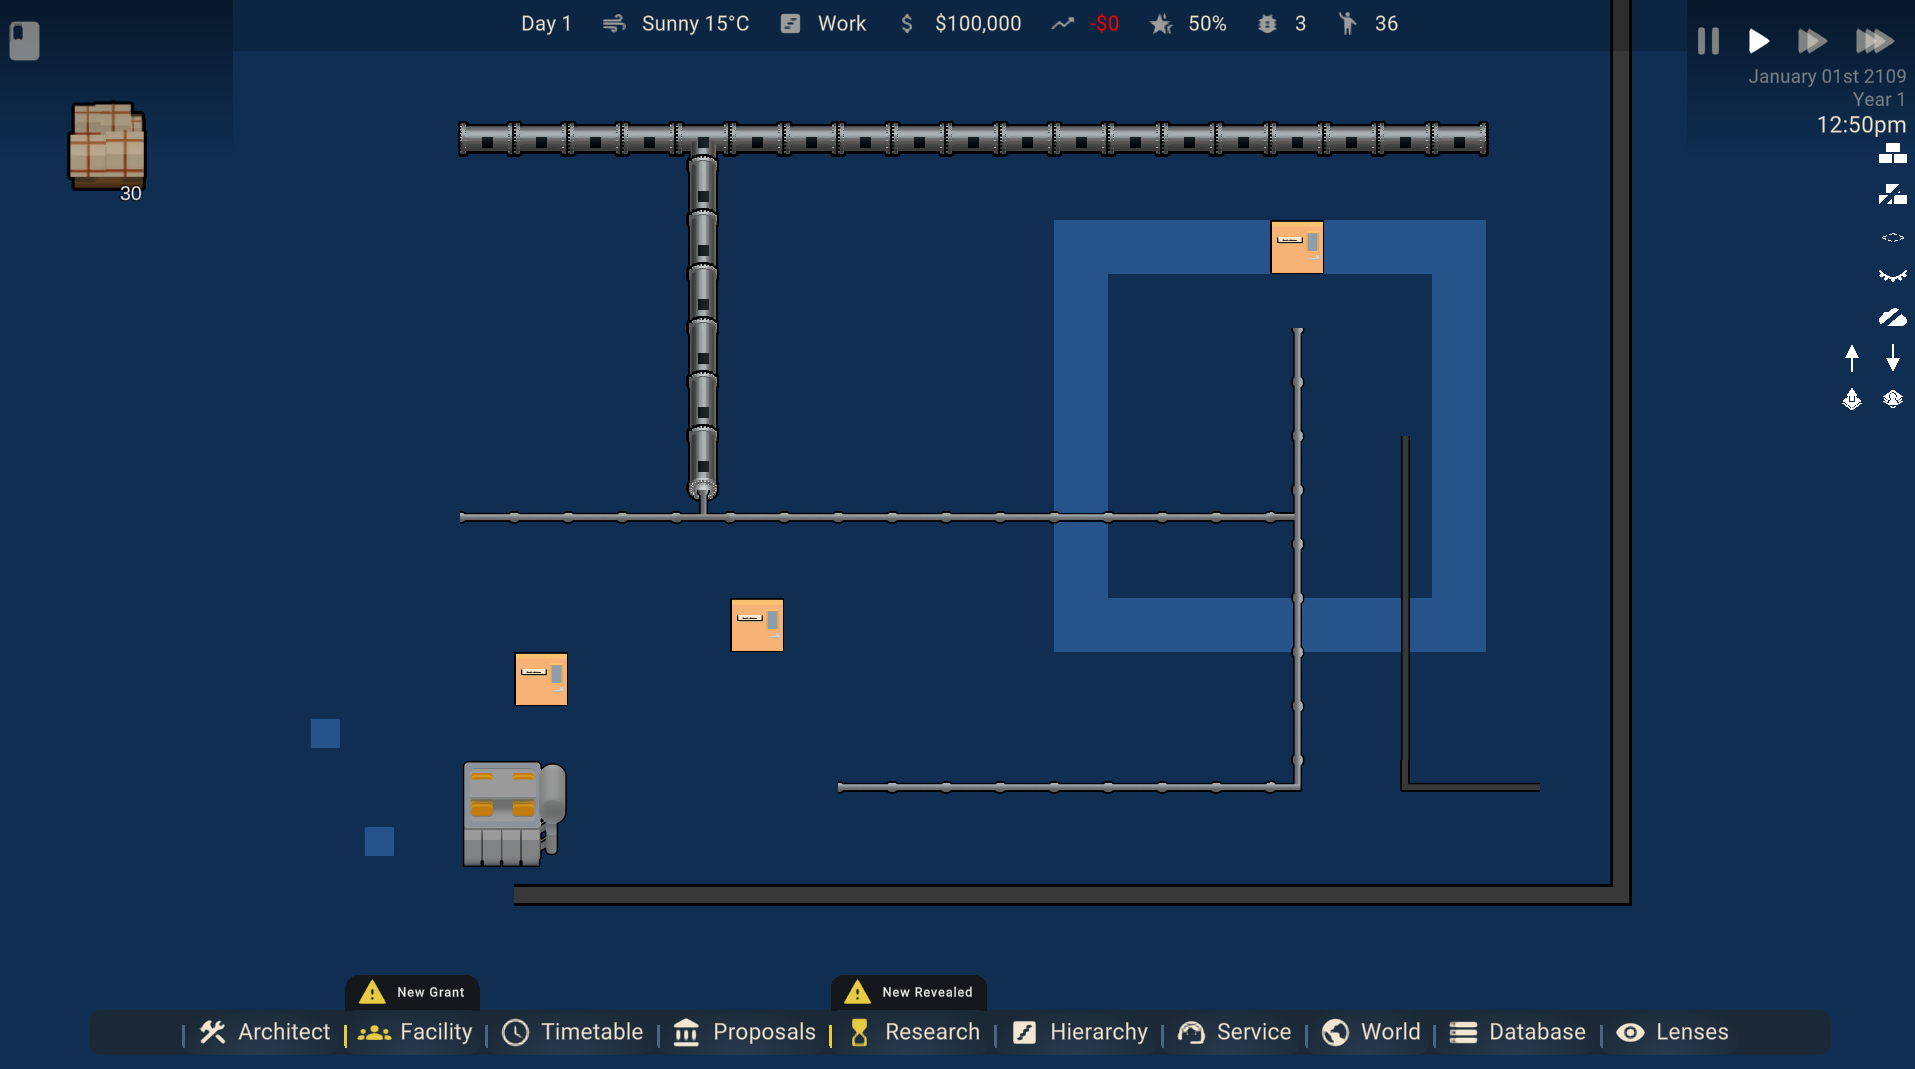
Side by side of the same view with and without logistic view
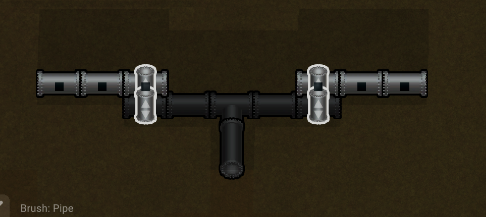
We’ve also added new electrical cables, which range from low to high power - mirroring what we have with our pylons in the game. Medium and low cables can pass through walls, making it easier to connect appliances that are inside your facility to your power network. We’ve also introduced “small pipes”, which are like normal pipes but - you’ve guessed it - they’re smaller. These too, can pass through walls, making it easier to connect up appliances like showers and toilets to your site’s larger fluid infrastructure. When pipes, or more generally any other tile entity, are connected between floors, the logistics view will also show a multi-floor connection icon, which will hopefully make it all make a tiny bit more sense!
An icon showing 2 pipes are connected between floors

More examples (visual issue with second has been fixed)
With the introduction of low to high power cables, our transformer sprite has been updated, since this transformer should be able to facilitate a connection between pylon power lines, and the new floor cables. The new transformers will be able, in theory at least, be able to connect up to any number of compatible power networks, not just the limit of 2 that we have right now. This means you could use a transformer to connect between high power lines from pylons, high power floor cables, medium power floor cables AND medium power lines - all with the 1 transformer. We’ll update you on the progress once it starts!
New transformer sprites
A couple of small changes we’ve made include showing the fluid bars correctly between floors (they used to overlay on top of each other, so you’d only see the highest floor pipe’s fluid bar). These fluid bars are also only viewable in logistics mode now. Finally, logistics mode is required to be able to mark wires and small pipes for deconstruction, as these may be placed under walls - since you may not want to destroy a whole wall to move a pipe somewhere!
Small features #
We end this blog with some very small features that have seeped their way into the game. I’ll keep this short and sweet.
Npcs can be swapped in the hierarchy tree.
Ok… that was maybe too short, but I’ll stick some media below to compensate.
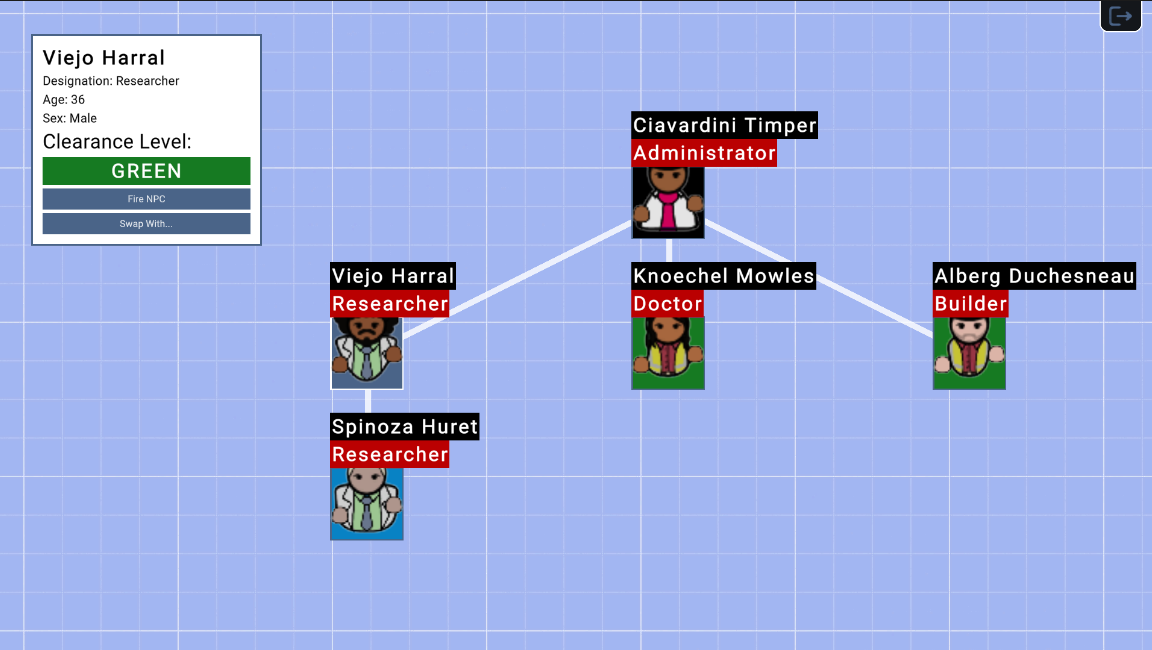
Staff tree now shows clearance card levels by colour coding nodes
Also Vacancies now show up in the tree (and can be filled through various commands)
Case Closed #
This has been a hefty one, we hope it was worth the wait! Progress has been slowly churning for the last few weeks, but it’s hard to really visualise how much we’ve done until we write it all down here. With one of our most USPs being the multi-floor aspect, we’re glad to see it’s coming to fruition, and isn’t a mess, yet :D
Thanks very much to our readers, and we appreciate your continued patience during our non-consistent uploads! Take care, and we’ll hopefully see you all back here in a couple of weeks for the next FF!
Case Closed.
The Team
Plasmarc Studios